Good lighting starts with one question: what is the light doing to the subject? If you can judge whether it is soft or hard, where it comes from, how bright it is, and whether the color looks natural, the main photography lighting basics become much easier to use. You do not need a studio first; a window, one lamp, or one flash is enough to start making better decisions.
Core photography lighting basics
Most beginner lighting problems come from four things: light quality, direction, intensity, and color temperature. When a photo looks harsh, flat, too dark, or strangely colored, one of these is usually the reason.
Light quality
Light quality means how hard or soft the light appears. Hard light, such as direct midday sun or a bare flash, creates sharp shadows and strong texture. Soft light, such as a cloudy sky, a large window, or a diffused lamp, gives smoother shadows and is usually easier for portraits, food, and small product photos.
Light direction
Light direction decides where shadows fall, so it has a bigger effect on shape than beginners often expect. Front light shows detail but can look flat, side light adds depth and texture, and backlight creates separation or glow. For portraits, watch the nose shadow, chin shadow, and catchlights in the eyes; they reveal whether the light is placed well.
- Need a clean ID-style photo? Keep the light near the camera for even detail.
- Want a more natural portrait? Move the light slightly to one side.
- Want drama or texture? Try stronger side light and control the dark side.
Light intensity
Light intensity is the amount of brightness reaching the subject. It affects exposure, but it also changes the mood of the image. A bright key light with little fill can look bold and contrasty, while a gentler balance between subject and background feels calmer.
Before changing camera settings, check the light itself. Move it farther away if highlights are blowing out, bring it closer if the subject is too dim, or reduce the power if you are using flash or LED. With window light, the same spot can look completely different on a sunny morning, an overcast afternoon, or at sunset.
Color temperature
Color temperature is the warmth or coolness of the light. Late-day sun may look golden, shade can look blue, and indoor bulbs may turn skin orange. If exposure looks fine but faces or product colors feel wrong, white balance or mixed lighting is probably the issue.
Basic lighting directions
Lighting directions are easiest to learn when you keep everything else still. Use one subject, one light, and one camera position, then move only the light. A face, mug, bottle, plant, or small product is enough.
Front lighting
Front lighting places the source near the camera and points it toward the subject. It is useful when you need clear detail, such as simple product shots, documentation, beauty content, or quick social media portraits. The tradeoff is depth: because shadows fall behind the subject, faces and objects can look flatter than they do in real life.
45-degree lighting
A 45-degree setup puts the light slightly to one side and usually a little above eye level. This is one of the safest starting points for beginner portraits because it gives the face shape without making the shadows too heavy.
If the photo feels too flat, move the light farther to the side. If the shadows become too strong, bring the light closer to the camera side or add a white reflector. For a beginner photographing a friend near a living-room window, this is often the first position worth trying.
Side lighting
Side lighting places the source around 90 degrees from the camera. It is strong for showing texture on food, fabric, wood, skin, or handmade products because the shadows reveal surface detail. It can also make portraits look serious or dramatic.
The risk is losing too much information in the dark side. A white wall, foam board, or reflector can lift the shadows without destroying the directional look.
Backlighting
Backlighting comes from behind the subject. It can create a rim around hair, glass, steam, leaves, or product edges, which helps the subject stand apart from the background.
Exposure is the part to watch. If the background is bright, the subject may become a silhouette. That can be intentional, but if you still want facial detail or product detail, add a little fill from the front or change your angle so the backlight is less overpowering.
Natural vs artificial light
Natural and artificial light can both work well. The better choice depends on control, timing, and the type of photo you need. If you mostly shoot during the day at home, window light may be enough. If you photograph products at night, shoot events, or need the same look every time, artificial light becomes much more useful.
Window light
Window light is one of the easiest ways to learn because you can see the shadows before taking the photo. Place your subject near the window, turn them slightly, and watch how the face or object changes.
Use sheer curtains if direct sun is too harsh. Move the subject closer for softer, brighter light, or farther away for a weaker and slightly harder look. For portraits, food, and small products, a window plus a white reflector can teach more than buying several lights too early.
Flash
Flash is best when you need power, consistency, or motion freezing. It is useful for indoor portraits, events, darker rooms, and situations where daylight is not reliable.
LED and continuous light
LED and continuous lights stay on, so they are easy to understand while you move them. They are practical for video, livestreaming, tabletop photos, and simple home portraits.
The limitation is brightness. Many small LEDs are weaker than flash, so in a dim room you may need a higher ISO, wider aperture, or slower shutter speed. For a still product on a table, that may be fine. For a moving child or handheld low-light portrait, flash may be the better tool.
Choosing the right light source
Choose the light that matches your real shooting routine, not the one that sounds most professional.
| Situation | Best starting choice | Why it works |
|---|---|---|
| Daytime portraits at home | Window light | Soft, simple, and easy to study |
| Products photographed at night | LED or flash | More repeatable than waiting for daylight |
| Events or moving subjects | Flash | More power and better motion control |
| Video or tutorials | Continuous light | You can see the result while recording |
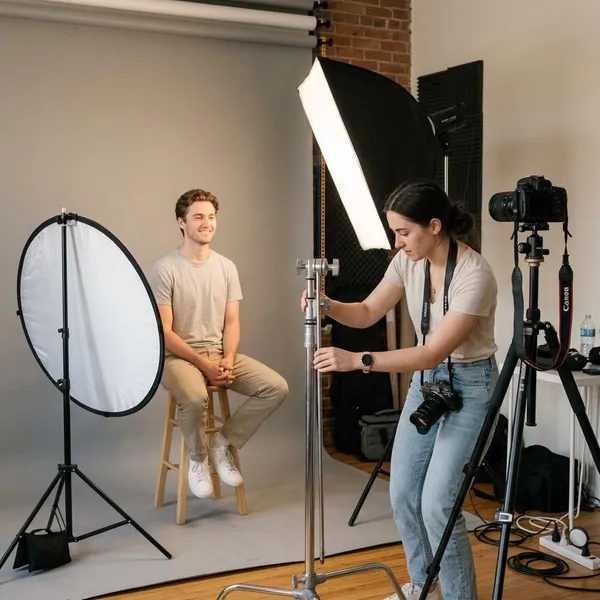
How to set up simple photography lighting
A good beginner setup is one light, one subject, and a few careful changes. Adding extra lights too soon makes it harder to know which decision improved or ruined the photo.
Start with one light
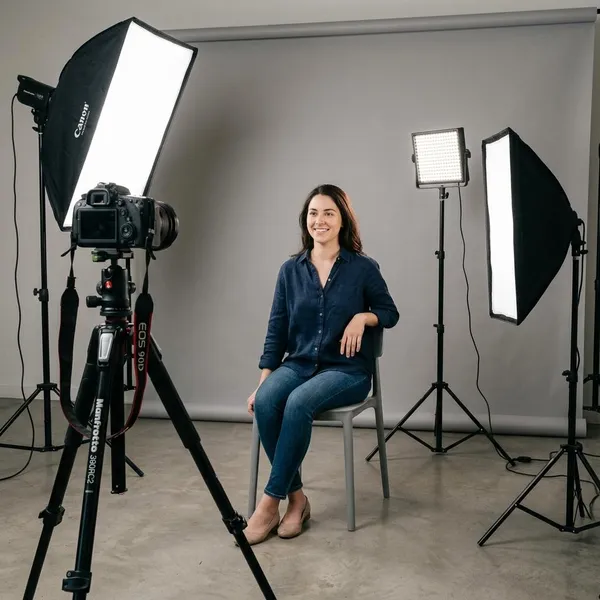
One light teaches the most important lesson: the main source creates the shape of the photo. It can be a window, flash, LED panel, desk lamp, or softbox. Do not add a second light until you can look at a test shot and explain why the shadows fall where they do.
Position your key light
The key light is the main light on the subject. For portraits, start around 45 degrees to one side and slightly above eye level. For small products, start from the front-side rather than straight on, so the object keeps some shape.
- Too flat: move the light farther to the side.
- Too dramatic: bring the light closer to the camera angle.
- Dark eye sockets: lower the light slightly or tilt it differently.
- Messy background: move the subject or reduce light spill behind them.
Adjust distance and angle
Distance changes more than brightness. A closer light usually looks softer and brighter; a farther light becomes weaker and relatively harder. Angle changes the shadow pattern, which changes the mood.
Make one change at a time. Take a test shot, look at the shadow edge, the brightest highlight, and the catchlights, then move again. This slower method builds judgment faster than changing the light, camera settings, and subject position all at once.
Control shadows
Shadows are not the enemy. They make the subject look three-dimensional. The real question is whether the shadow side still has enough detail for the style you want.
If shadows are too heavy, bounce light back with a reflector, white wall, curtain, or foam board. If the image looks lifeless, remove some fill or move the key light more to the side. For a clean online product photo, you may want gentle shadows; for a moody portrait, deeper shadows can be the whole point.
Check exposure and white balance
Check the technical basics only after the light position makes sense. If highlights are clipped, lower the light power, move the source back, or adjust camera exposure. If skin or product colors look wrong, set white balance for the main light and remove competing color sources where possible.
- Take one test photo before fine-tuning.
- Check the brightest areas first, especially skin, white objects, and reflective surfaces.
- Look for unwanted color casts from lamps, screens, or mixed daylight.
- Make one correction, then shoot another test frame.
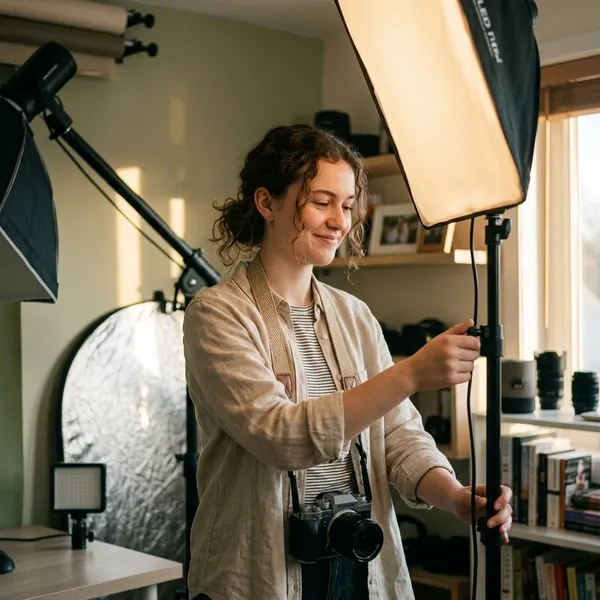
Conclusion
Better lighting usually comes from noticing one thing at a time: softness, direction, brightness, and color. Start with one light, place it with intention, and use the shadows as feedback instead of trying to remove them all. Once that feels natural, new gear becomes a choice rather than a shortcut.