If you are trying to improve studio photoshoot lighting, start with one clear decision: do you need flash power for still photos, or do you need continuous light you can see while you work? For most beginners, one good light, a softbox, and careful placement will do more than a crowded kit with three cheap lights. Add extra lights only when they solve a specific problem, such as heavy shadows, a dull background, or poor separation.
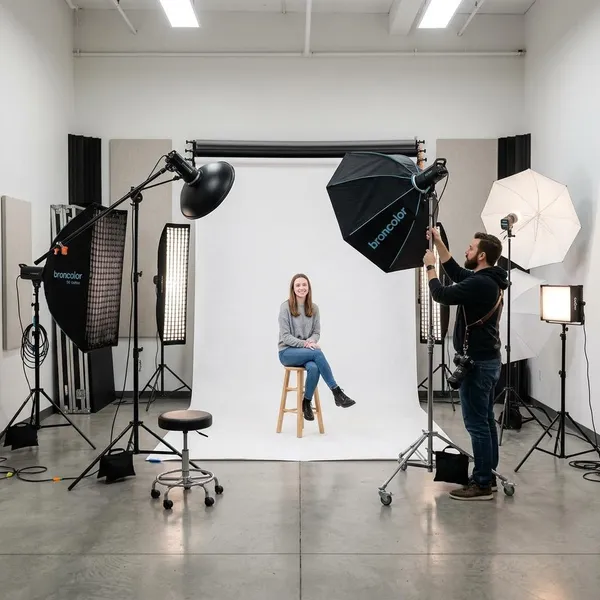
Types of studio lighting
Studio lighting usually falls into two practical categories: flash strobes and continuous LED lights. Both can look professional, but they change the way you shoot. Strobes give you more burst power for still photography, while LEDs let you see the lighting pattern before you take the photo.
Strobes and monolights
Strobes fire a short, bright burst of light when you press the shutter. A monolight is a self-contained strobe, so the power supply and flash head are built into one unit. This makes modern strobes easier to use than older pack-and-head systems.
The main advantage is output. A strobe gives you more room to use a low ISO, smaller apertures, larger modifiers, and darker ambient rooms. If you shoot portraits, fashion, dance, or kids who do not sit still, that short flash burst can also help keep images crisp.
Continuous LED lights
Continuous LEDs stay on, so you can see shadows, catchlights, background brightness, and reflections in real time. That makes them easier to learn with, especially in a small home studio where moving a light a few inches can change the whole image.
Choosing between flash and LED
Choose strobes if your main goal is still photography, clean files, strong output, and motion control. Choose LEDs if you want live preview, easier setup, and one light that can also handle video.
| What you shoot most | Better first choice | Why it makes sense |
|---|---|---|
| Studio portraits only | Strobe | More power for softboxes, low ISO, and smaller apertures. |
| Product photos plus short videos | LED | The same light works for stills and motion. |
| Small home setup with no experience | LED or simple strobe kit | LEDs are easier to preview; strobes give more photo power. |
| Action, fashion, or moving subjects | Strobe | Flash duration helps freeze movement. |
How many studio lights do you need?
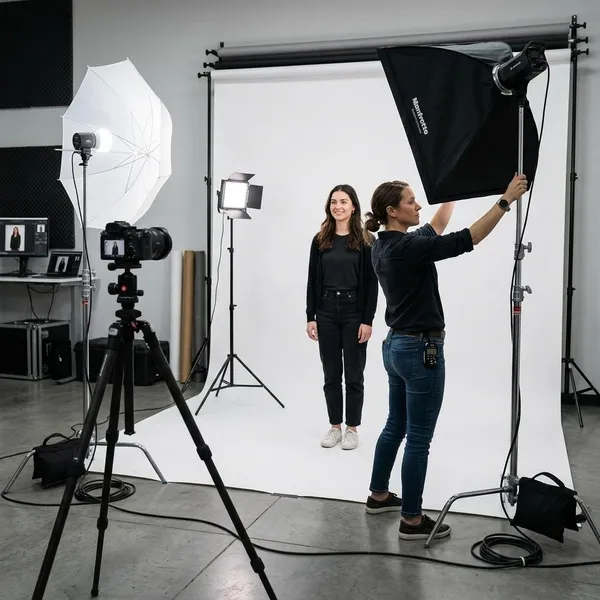
Most people should start with one light. A second light adds control, and a third light is useful only when you need separate control over the subject, background, or edge separation. More lights can make a setup better, but they can also make it slower, flatter, and harder to troubleshoot.
One-light setup
A one-light setup is often enough for portraits, small products, profile photos, and social content. Place the light about 45 degrees to one side of the subject and slightly above eye level, then use a reflector or white board on the shadow side if needed.
This is the best setup for learning because every change is obvious. Move the light closer and it gets softer. Move it farther away and it becomes more even but harder. Shift it toward the camera for a cleaner beauty look, or farther to the side for more drama.
Two-light setup
Two lights are useful when one light gives you a good subject exposure but leaves one specific issue unresolved. The second light can work as fill, background light, or rim light.
Three-light setup
A three-light setup usually uses a key light, fill light, and either a rim light or background light. It is helpful for polished portraits, catalog-style product work, and repeat shoots where consistency matters.
The downside is space. In a small room, three lights can bounce off walls and ceilings, reducing contrast and making the photo look less intentional. Add a third light when you need independent control, not because a three-light setup sounds more professional.
How to set up studio lighting
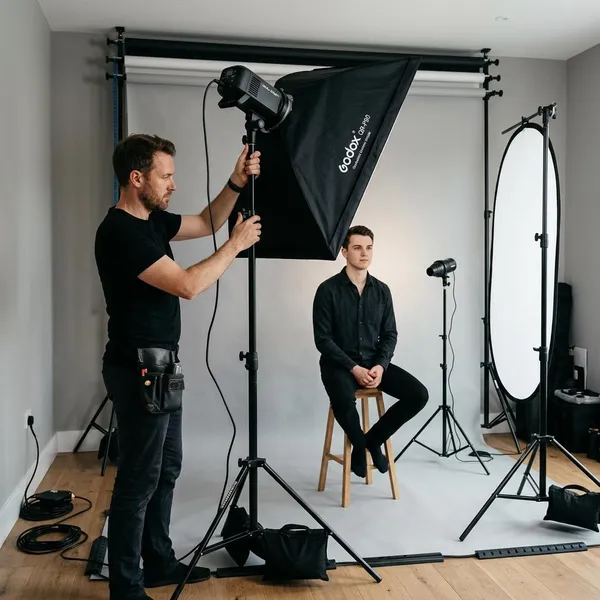
A reliable lighting setup comes from working in the right order: place the key light, soften it, control shadows, add extra lights only if needed, then lock in camera exposure. Changing everything at once makes it hard to know what fixed the image and what made it worse.
Position the key light
Set the key light first because it defines the overall look. A safe starting point is 45 degrees to one side and slightly above the subject's eyes. For products, place it where it reveals shape without throwing glare directly back into the camera.
Soften the light
Soft light comes from making the apparent light source larger relative to the subject. A softbox close to a face will usually look smoother than the same softbox placed far away. Lowering brightness may fix exposure, but it will not turn hard light into soft light.
Control shadows
Shadows are not a mistake; they give shape. The useful question is whether the shadow helps the photo or distracts from it.
- Too dark: add a white reflector, move it closer, or reduce the key light angle.
- Too flat: remove fill, move the key light sideways, or block stray bounce.
- Too messy: check whether light is spilling onto walls, the ceiling, or the background.
Add fill or rim light
Add fill when you like the direction of the key light but want more detail in the shadows. Add rim light when the subject needs separation from the background. These are different fixes, and mixing them up can make the image look bright but still unclear.
Adjust camera exposure
Use manual exposure for studio work so the camera does not change brightness from frame to frame. With strobes, start with a low ISO, a shutter speed within your camera's flash sync limit, and an aperture that gives the depth of field you need. With LEDs, watch for motion blur and noise because you may need a slower shutter speed or higher ISO.
- Set the camera to manual mode.
- Choose the aperture for the look first, especially for portraits or products that need depth.
- Take a test shot and check highlight clipping, skin tone, and shadow detail.
- Change one thing at a time: light position, modifier distance, light power, or camera settings.
Essential studio light modifiers
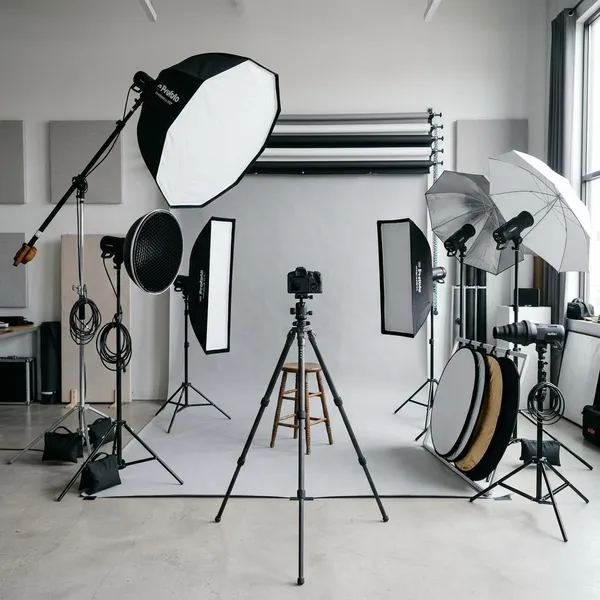
Modifiers decide how the light spreads, how soft it looks, and how much control you have. A modest light with the right modifier often looks better than a powerful bare light pointed straight at the subject.
If you are building a first kit, do not buy every modifier at once. Start with the one that fits your main subject, then add more when you can name the specific look or problem you want to handle.
Softboxes
A softbox is usually the safest first modifier. It creates soft, directional light and controls spill better than an umbrella. For portraits, a medium or large softbox gives flattering transitions across the face. For products, a strip softbox can create long, clean reflections on packaging, glass, or bottles.
Umbrellas
Umbrellas are inexpensive, quick to open, and forgiving. They are useful when you want broad soft light without much setup time.
The catch is spill. In a large room, that may be fine. In a small white room, an umbrella can bounce light everywhere and make the photo look flat. Use one when simplicity matters more than precise control.
Reflectors
A reflector is often the cheapest way to improve a one-light setup. White reflectors give gentle fill, silver reflectors bounce more strongly, and black flags can subtract light when the scene is too washed out.
For a simple headshot, place a white reflector on the shadow side of the face before buying a second light. For tabletop products, move small white cards close to the item and watch how the edges and labels change.
Grids
Grids narrow the spread of light. They are helpful when you want to keep light off the background, create a cleaner rim light, or stop a small room from filling with uncontrolled bounce.
A grid is not always necessary for a first kit, but it becomes valuable once your main problem is precision rather than softness.
Beauty dishes
A beauty dish gives a punchier look than a softbox but is smoother than a bare reflector. It is popular for beauty, fashion, headshots, and portraits where you want definition in the face rather than very soft, wrapping light.
How to choose studio lights
Choosing studio lights is mostly about matching the light to your space, subjects, and workflow. Do not start with the biggest wattage number. Start with what you shoot most often, how much room you have, and whether the light must also work for video.
Light output
Light output affects how much flexibility you have with modifiers, ISO, aperture, and subject distance. More output helps when you use large softboxes, photograph groups, shoot full-length portraits, or want to overpower room light.
For small products or seated portraits in a home studio, moderate output may be enough. For groups, full-body fashion, or a large soft source placed farther from the subject, you will want more headroom.
Color accuracy
Color accuracy matters when skin tones, clothing, cosmetics, food, or product colors need to look reliable. Many LEDs list CRI or TLCI ratings, and higher ratings are generally a better sign, although specs are not the whole story.
Modifier compatibility
Modifier compatibility affects how easily your kit can grow. A common mount, such as Bowens mount on many monolights, gives you more choices for softboxes, reflectors, grids, beauty dishes, and strip boxes.
Studio space
Your room changes your lighting more than the product page suggests. Small white rooms bounce light everywhere, while larger or darker spaces give you more control. If your setup is in a spare bedroom, avoid buying oversized modifiers before measuring where the stand, subject, and camera will actually go.
- Small room: softbox, grid, reflector, and careful spill control.
- Larger room: bigger modifiers, more distance, and multi-light setups are easier.
- Temporary setup: compact stands and quick-open modifiers matter more than maximum power.
Budget and portability
A good beginner budget should include the light, stand, modifier, trigger if needed, and basic grip items. Spending everything on the lamp head and leaving no money for a softbox or stable stand usually leads to weaker results.
If the gear stays in one room, AC-powered lights and heavier stands may be fine. If you pack the setup away after every shoot or carry it to clients, weight, setup speed, and bag size become real features, not small conveniences.
Conclusion
The most useful studio setup is the one that solves your real shooting problem with the least friction. Start with one reliable light, shape it with a softbox or reflector, and learn how angle, distance, and exposure change the result. Add strobes for still-photo power, choose LEDs for live preview and video, and expand only when the next piece of gear has a clear job.